led_soldering
Soldering an LED to a cable
Most times, you want to mount your PCB in a housing. To place the LED at your preferred position in the housing easily, you should solder the LED to some wires and the wires to you SHC PCB. Here's how to do this:
- Cut the wires on the LED down to about 4mm.
- Put a little solder to the wires of the LED.
- Cut two cables of about 5-10cm and remove the insulation for about 5mm at the ends.
- Put a little solder to the ends of the cables.
- Cut the tinned ends of the cables down to about 2mm.
- Put a little solder to the tip of your soldering iron.
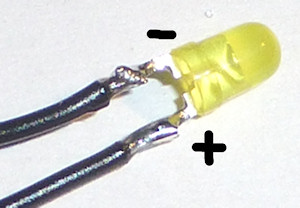
- Place one tinned end of one cable next to one pin of the LED and hold the soldering iron's tip to them for about half a second. This should create a nice solder joint.
- Do the same for the 2nd cable and the other pin of the LED.
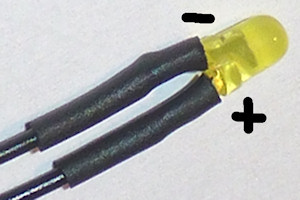
- Get about 10mm of heat shrink tube and place it over the soldering area.
- Heat the tube shortly and carefully with the flame of a pocket lighter. It shrinks and should isolate the soldering area afterwards.
- Solder the other end of the wires to your PCB. The + pin of the LED (which was the longer pin before you cut it) is the one which is connected to a small wire inside the LED and goes into the center of the LED.
led_soldering.txt · Last modified: 2015/02/21 21:31 by breaker27


